Tuesday, January 31, 2012

While I'm Waiting...

While I'm waiting on the flooring tiles to come in this week, I'll go ahead and share some more photos with you of The Coffee Cup's transformation in Michigan.  This is from the latest batch of pictures that Tony sent me and once again, I'll include his captions.

"The old deck is removed"

"Here the new deck is in place and the frame has been primed"

"The wheel wells have been re-done"

"Wheel wells are installed"

"The old walls are headed to the dumpster"

"Here are the new walls waiting for installation"

As you can see, we've reached the halfway point and the re-framing and reconstruction have begun.  The first half was the scary part with all the demolition and tear down.  We've turned the corner to the fun part where everything gets put back together again and all my Coffee Cup decisions and decorating touches will come into play.

Thanks for stopping by today to check on my little Scotty's progress.  In my studio, I'm working on a lamp for the dinette table that will involve lots of campy-kitschy coffee items inside an old Ball jar.  I hope to finish that up within the next few days, so drop back in to see the latest news in this most excellent Java Journey!


Saturday, January 28, 2012

Flooring Decisions

This week I was able to nail down the exact flooring for The Coffee Cup!  Tony sent some scanned samples via email, but it was next to impossible to make a decision based on those tiny pictures.  When I met with him back in June, I simply had said "alternating black and cashew-colored tiles laid on the diamond".  I know, I know......it was pretty vague.

The inspiration for my floor came from this camper I had seen for sale in California.  The minute I saw their tiles on the deck, I knew I would reproduce it in my Coffee Cup colors.  Here are two photos of that floor....pretty cool, huh?


On Thursday, Becky and I visited our local flooring store in town to be able to see flooring tiles in person.  Originally I was thinking of solid colors, but after seeing the tiles, I decided to go with ones that had a slight pattern, a mottled appearance.  Additionally, I was thinking black, but then I saw one called Mocha.....a dark brown.....and I figured it was kismet!

Becky and I were putting tiles side by side, putting my vinyl dinette samples side by side and it didn't take me too long to make a choice with her help.  The flooring is by Azrock.....a standard vinyl composition tile, commercial grade, 12 x 12......and I love it!!


The darker of the two tiles is called Mocha and is a deeper brown than shows up here.  Think about the color of hot chocolate or a mocha from McDonald's and that would be it.....LOL!  The tile on the right is called Elemental and it has a variety of colors in the java/coffee family.  I can't wait to see it on the Cup's floor!  I've got my fingers crossed that I'll be seeing it next week!!


Wednesday, January 25, 2012

Progress In Michigan

I've been chatting with Tony off and on today about a couple of flooring details.  My decision from the git-go was to have alternating colors of linoleum laid on a diamond pattern for the floor.  I was definitely thinking of black and hoping to find a suitable match to the "cashew" color that will be in the vinyl dinette seating.  

Surprisingly, finding the cashew didn't prove to be the problem after all.  The kink in this plan has been that the company supplying the cashew didn't have a black...only dark charcoal.  So I'm waiting to get some samples via email from Tony and make a decision.  I'm fine with the dark charcoal, but I want to see it first before proceeding.

Tony also relayed that the cabinets are being assembled and as soon as the flooring is laid, those cabinets can be installed.  Woohoo......progress in Michigan!

So while I'm waiting on linoleum photos to arrive, let me share a few more pictures and comments.  Hold on to your camper hats for these!!

"Well, she's looking a little bare, but better days are coming!"

"I always feel bad for the displaced critters when we do this."

"Looks like the last pile for the dumpster."

"The skin is off the camper."

"Hey, cool shirt there!"

"Another look at that shirt."

"Now that's what I call 'bare bones' camping."

"One more look...wow!"

Wow is right!  The only thing holding up the side walls is a thin strip of wood across the top.  Next step will be to remove the wheel wells, take off the deck, inspect and re-coat the frame, install a new axle, and replace the old deck.  There's DEFINITELY exciting progress in Michigan!!

Friday, January 20, 2012

A Half Dozen More...

With actual coffee cup in hand, the first thing I've been doing each morning is to check and see if any new pictures have arrived.  I suppose that's kinda what you've been doing since I shared the first half dozen with you on Tuesday.

I keep hoping to get an update this week on my Coffee Cup's progress and I know I should practice patience, but %#@* this is difficult!  If you'd like to see and hear some news, then multiply that by 1,000 and you'll get an inkling of what I'm going through......LOL!  

OK, OK,  I knew what I was getting into when I signed on the dotted line and left my sweet Cup in Michigan.  So instead of huffing and puffing, I'll just share a half dozen more pictures and captions from Tony.  Here you go......


"One last look at the side door"

"First things first; a good cleaning"

"Scrub her up!"

"OK, here we go; now for the tear down"

"That's my son, he's helping out today"

"Looks like we are about to remove the door"

You are absolutely NOT going to believe the next picture in this Java Journey and that's all I'm going to tell you.  I guess that means you'll just have to keep stopping by to see what I'm talking about.  In the meantime, have a great weekend and if you are out there in your little camper......have fun, stay warm and be safe!!


Tuesday, January 17, 2012

So Far Away...

Without a doubt, the hardest thing about this Java Journey, is the fact that the whole process of bringing The Coffee Cup back to life is taking place so far away.  With Jackson, Michigan being 651 miles from here, I just can't hop in the car to see her progress.  If she were close by, say an hour or so, I'd make that trip weekly!  

I spent a lot of time soul searching this decision about having the work done so far away.  I'm normally a patient-person, but I'm also a hands-on person, a photo-documenting person.  Tony promised me that he would keep me up-to-date with pictures and emails about The Cup's progress.  I have to nudge him every few weeks to keep that promise.  I made copious notes and drawings about what I wanted and left them with Tony when we met back in June.  And we have chatted about aspects of the re-framing since then.


I keep a notebook with every bit of correspondence we have, invoices and receipts of items I've purchased, vinyl and fabric swatches.....EVERYTHING that's Coffee Cup related!  

My excitement and nervousness were off the chart when I received the first batch of photos from Tony.  I'll share them with you along with his captions for each photo...


"One last look before we tear her down"

"Looks like a new pooch is in order"

"Interior shot before we tear out"

"More interior"

"Cool lamp!  You gotta love it"

"A look at the rear gaucho, as they are called"


Looks like you'll have to show a little patience too in waiting for the next group of pictures.  I promise I won't make you wait too long.  Thanks for dropping by today to catch up on my Java Journey!


Tuesday, January 10, 2012

Homespun Hoedown

SplashT@B, Murphy The Camper Dog and I had one last Sisters on the Fly camping trip in October of 2011.  We pulled out on a rainy Tuesday and drove for 7 hours in wet, drizzly, foggy weather to northeast Alabama, site of the Southern Fried Homespun Hoedown.  Most of the Sisters arrived on Wednesday and avoided the kind of weather I had to endure!

The entire weekend was full of craft sales in the mornings, meeting and greeting and visiting during the day, and potluck meals in the evening. 


Murphy and I went out exploring on Wednesday morning and when we got back, lots more Sisters had rolled in.  And much to my delight, my good T@Bbin buddy, Sue Luke, was parked right beside us in her Roadtrek.  We didn't get to visit much before the rains set in again!


Thursday we awoke to a gorgeous fall day that was an omen for good things to come.  We gathered in the pavilion mid-morning to make twig tables.  After lunch, several of us took the Sequoyah Caverns tour and I was able to take one of my flutes down in the cave and play a bit.  Another potluck supper just as big as Wednesday's rounded out the day.


On Friday we had 30-minute craft demonstrations on a variety of fun topics....altering train cases, watercolor painting, basket-making using t-shirts, quick and easy knitting and more.  And believe it or not, we had time to make a twig basket and eat a catered lunch.  Of course in between those activities, we visited and checked out all the cool vintage trailers.


On Saturday, we traveled to Collinsville for a huge flea market in search of Sister treasures, then went to the Mentone Fall Colorfest.  That evening was the event everyone was waiting for....the People of Walmart Party and a bar-be-que supper catered by Big Bama Jim's.  I wish I could show you more of the outrageous outfits that the Sisters had on, but most of my pictures are close to x-rated!!


Anita Jones-Wallace and her crew of helpers put on a fantastic gathering!  And there's no way I could describe the weekend in just this one Coffee Cup blog.  But if you have some time, I'd love for you to pick up a Postcard each day from HERE to get the whole story.

It was a fun weekend and what made it extra special was the fact that I knew The Coffee Cup was now a reality and I could start using the word "when" instead of the word "if" when I talked about her!


Saturday, January 7, 2012

The Cup's Retro Radio Project

I've got a list of projects....you know, artsy-fartsy stuff....that I hope to do before my Coffee Cup arrives.  Most of them are in the process of being created, but I have finished one completely.  My monkey-mind just spins and spins and I have a really tough time starting and finishing one project before moving on to the next.  My excuse is it's my creative right-brain at work and I'm stickin' to that story!

I've seen some retro-looking radio/iPod players that are cool, but the price tag on those are out of line with what I want to spend.  So I got the idea to find some sort of vintage radio (that didn't work any more) that I could convert to use with my iPod and a speaker or two.  The quest began with looking in all my favorite antique shops and malls here....but nothing I found felt or looked quite right.

When Becky and I were in Williamsburg in early December, we went to a new antique store in Toano and there it was!!  Interesting shape, made of wood, knobs still intact, speaker cover in place, good price, no longer worked....SOLD!


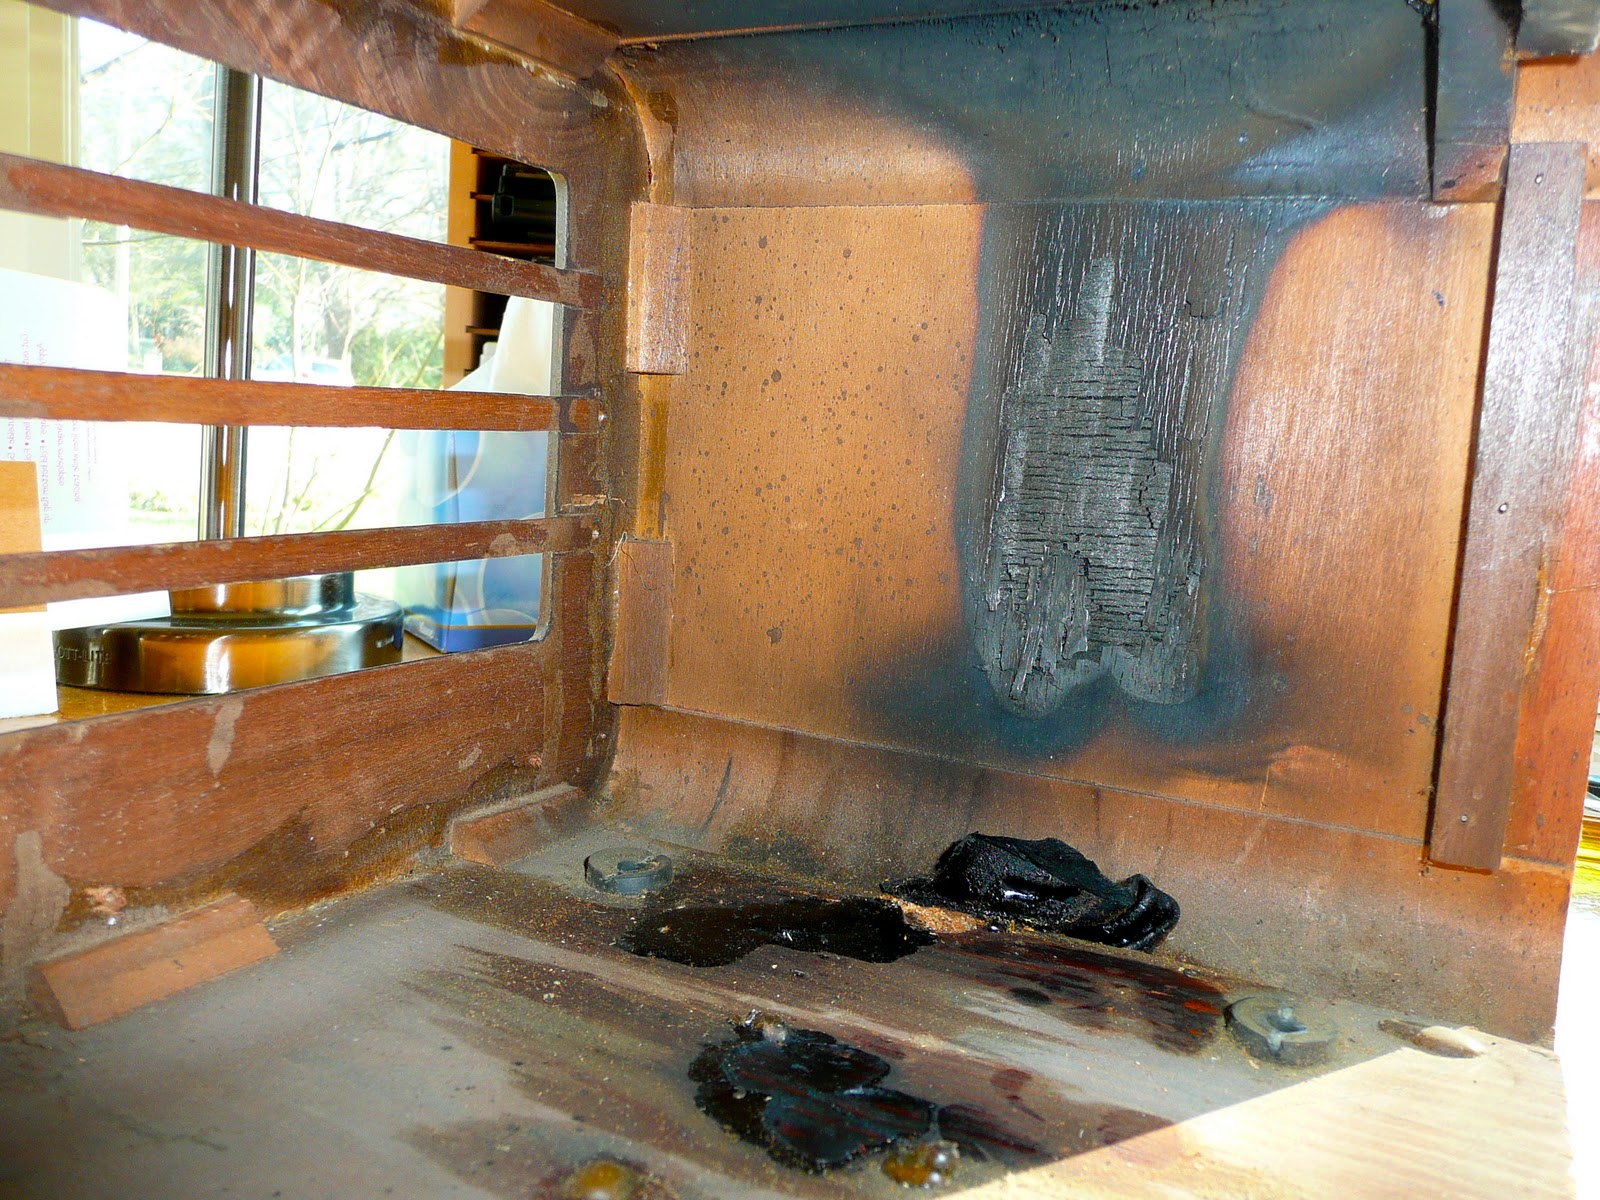
It had a dark streak down the right side and I thought something probably had been set on top of it and it spilled.  That mystery would be solved when I got inside.  My plan was to gut the radio; save the dials, knobs, and speaker cover; and clean it up.  First step was to take off the back and see what I would be working with inside.


OK....this would be pretty straightforward, I thought.  And except for a few screws that didn't want to budge, it was.  After carefully pulling the three knobs off the front and taking four screws out of the bottom, the whole inside assembly slid right out.  It was then that the mysterious dark spot was revealed!


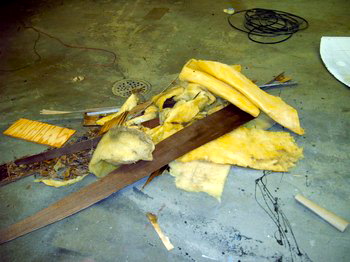
At some point in the life of this vintage radio, there had been a little fire inside!  It still had a faint odor of burned and fused components.  With tools in hand, I set about clipping wires, taking out screws, and cleaning up this portion.  Next I starting removing the tubes and other unidentifiable objects, until everything was neater and cleaner looking.  Then I mounted a piece of cork on top of the metal box for my iPod and compact speakers to sit on.


The last steps in the Cup's retro radio project were to clean the glass dial, reposition the needle on the dial, add a new piece of scrapbook paper behind the dial, remove the speaker, trim the ragged edges of the burlap speaker fabric and reassemble everything.


The only thing left to be done was to clean the wood a bit and use the trick of rubbing a walnut in the scratches to make them disappear.  This project is finished and the next photo of my vintage radio/iPod player will be when it sits in The Coffee Cup!  I promise I'll share that with you this spring.